Layer 3 of 7 — you are here
Day Three · Companion to Chapter 6
The Devices
The network wall guards the house. Today we armor each device individually, so the protection travels — into the school parking lot, onto the neighbor's Wi-Fi, onto cellular. Work through your Inventory's Screens list device by device.
iPhone / iPad: Screen Time
- On the parent device: Settings → Screen Time → [child's name] (child accounts from Layer 2 appear here automatically). Managing from the parent device is better than configuring on the kid's device — the settings live behind your Face ID, not in their hands.
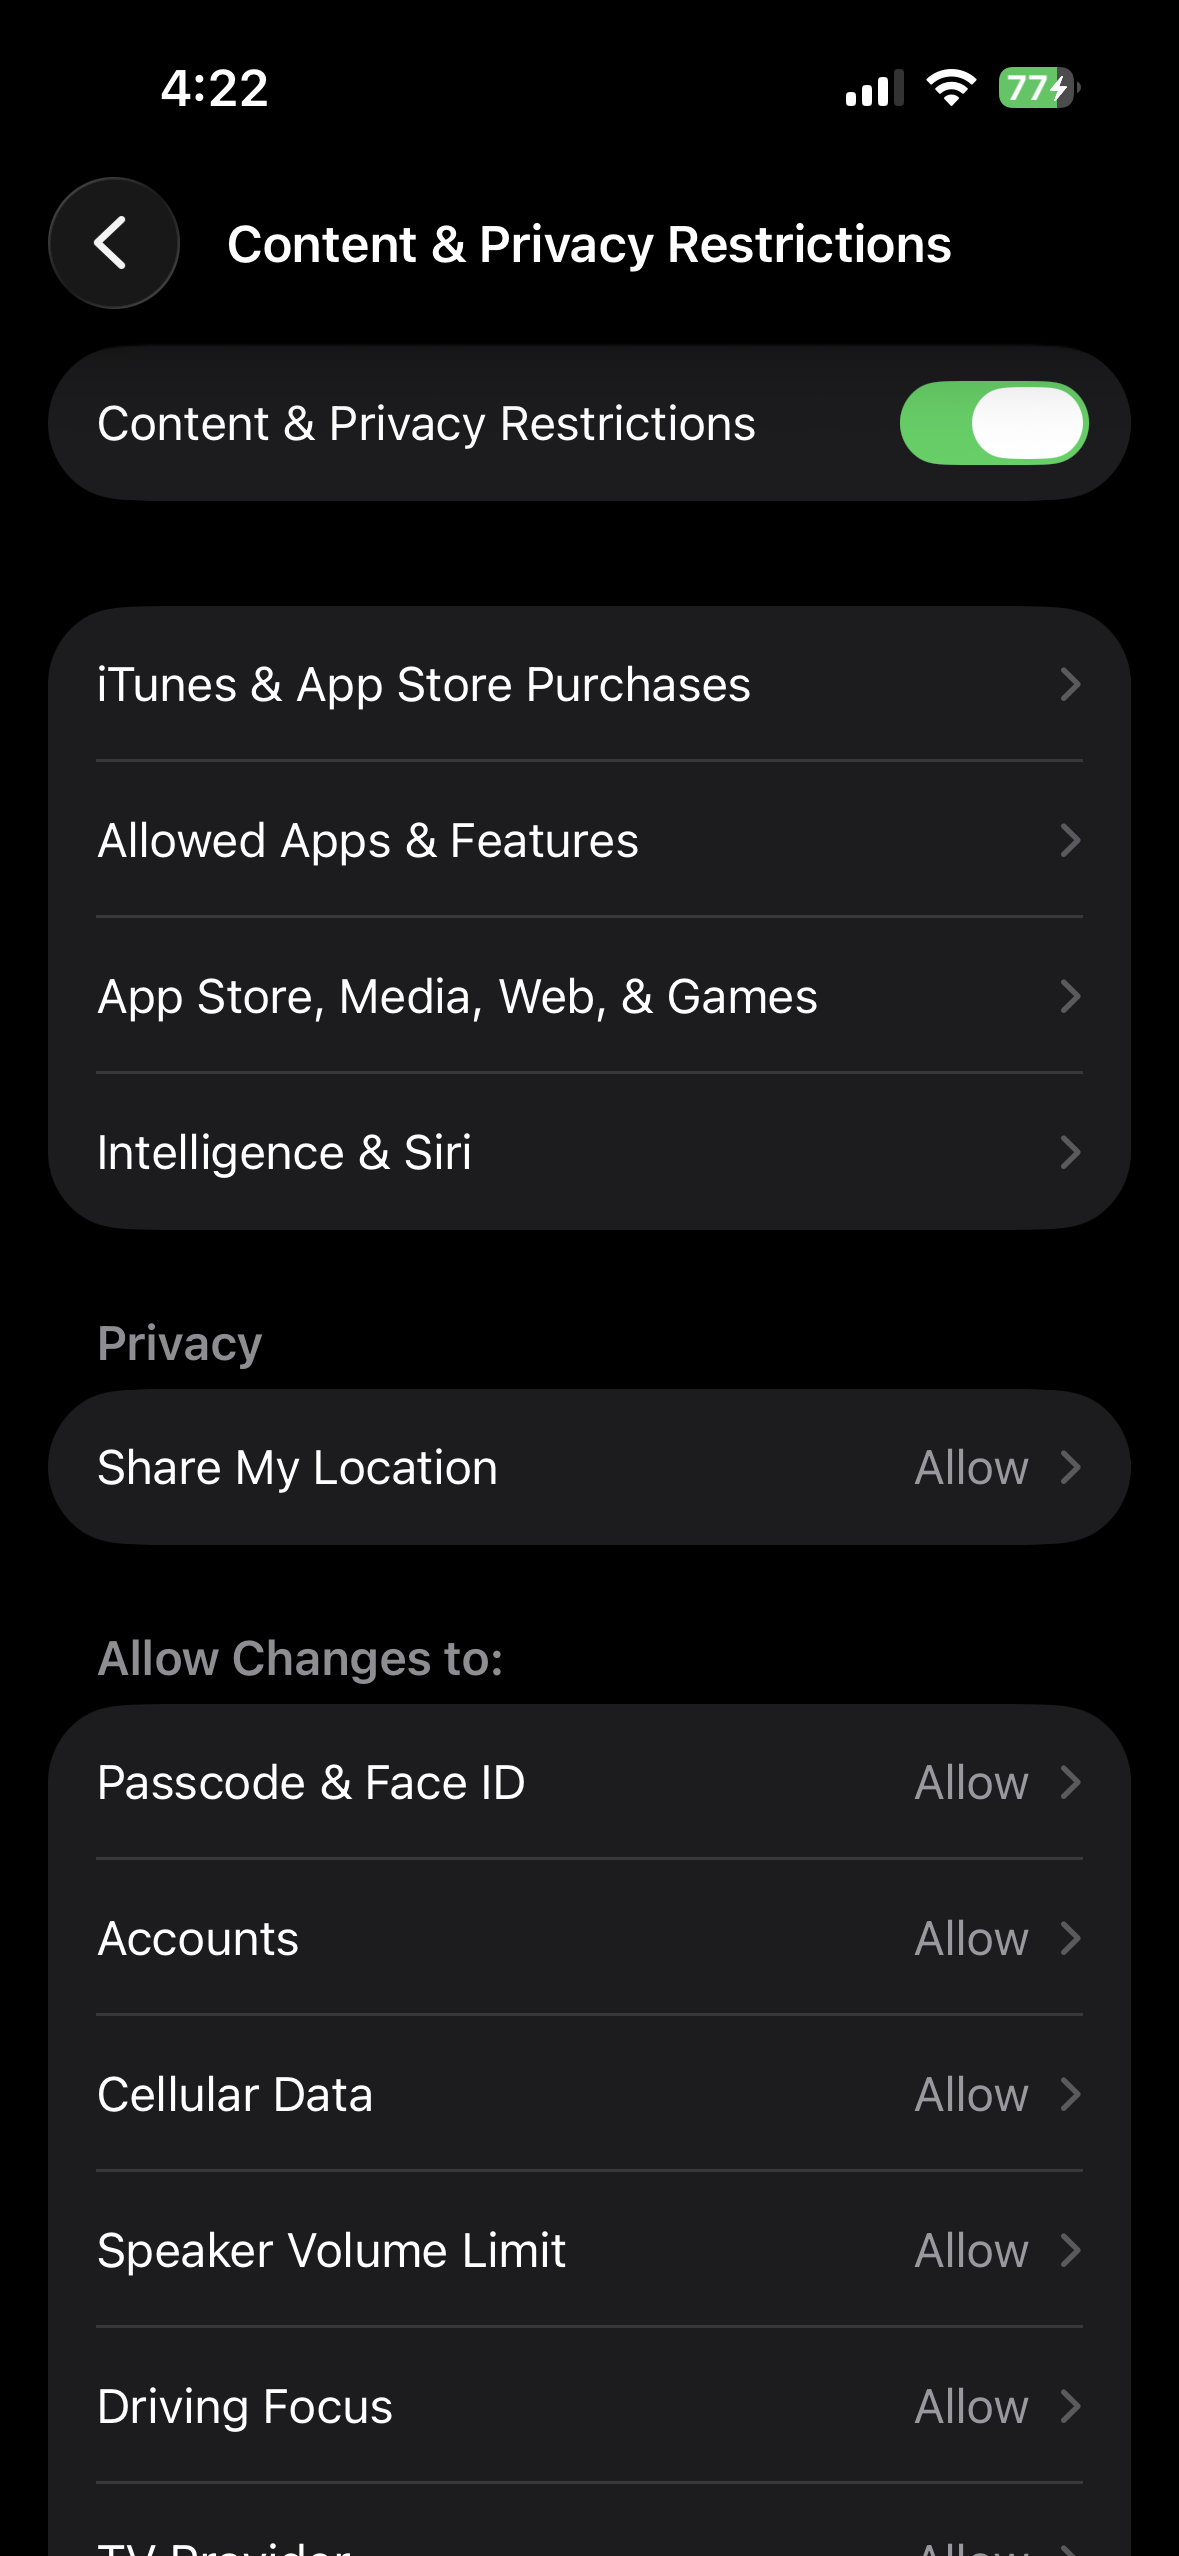
- Open Content & Privacy Restrictions and turn the master toggle on.
- Inside Content & Privacy Restrictions, open App Store, Media, Web, & Games (iOS 18 added this middle layer) and set: age-appropriate ratings for apps, movies, and TV; Web Content → Limit Adult Websites (the device-level cousin of your DNS wall); explicit content off for music and books.
- Block changes to accounts and passcode settings (in the same restrictions area) so the account you fixed yesterday stays fixed.
- Set a Screen Time passcode — separate from the device unlock code, known only to parents. Without it, everything above is a suggestion. This passcode is a wall key: it goes in the vault on Day Six, and it is never a birthday, an anniversary, or the garage code. (Since iOS 18.5, parents get a notification when the child's Screen Time passcode is used — leave that on.)
Android / Chromebook: Family Link
- In the Family Link app on the parent phone: [child] → Controls.
- Controls → Google Play: set rating ceilings for apps and games.
- Controls → Google Chrome and Web: "Try to block explicit sites." (Allow/block lists live under Manage sites.)
- Controls → Google Search: SafeSearch on.
- Review app-by-app controls: Family Link lets you block or approve individual apps already on the device, and every new install routes through the purchase-approval gate you set in Layer 2.
The shared computer
The family desktop or laptop needs the oldest trick in the book: separate front doors.
- Individual accounts for each user. Kids get standard (non-admin) accounts. Mac: manage per-user via Screen Time. Windows: Settings → Accounts → Family → Add someone → "Create one for a child" (standard account by default — keep it that way), then manage filters and screen time from the Family Safety app or family.microsoft.com. One Windows caveat: Family Safety's web filtering only works inside Edge — it blocks other browsers to compensate, and your network wall covers whatever slips past.
- Admin account is password-protected with a vault-tier password — kids can't install software or change system settings without you typing it.
- Auto-login off. An auto-login machine makes every other control on it decorative.
The traveling wall
Your DNS wall from Layer 1 stops at your front door. The phone doesn't. The traveling wall puts the same filtering on the device itself, so it works on cellular and on other people's Wi-Fi.
- Install the DNS service on the device. For NextDNS: on iOS, install the NextDNS app and sign into your configuration, or generate a configuration profile at apple.nextdns.io (the profile is what the supervision play below locks down); on Android, the NextDNS app, or Android's Private DNS setting pointed at your configuration's DNS-over-TLS hostname.
- Verify ON CELLULAR. Turn off Wi-Fi, then load the test page and the dummy test sites (see Layer 1's verification section). If you only tested on Wi-Fi, you tested the router, not the phone.
- Now test removal. Hand yourself the kid's device and try to delete the app or profile. On a stock device, you can — a profile has a Remove button and an app can be deleted. Restrictions help (Screen Time can block app deletion), but the honest answer is the deeper cut below.
The deeper cut: Apple Configurator supervision + the removal-lock
This is the strongest move on this page, and the one Chapter 6 leans on hardest. A normal iPhone treats a DNS profile as a guest: it can be shown the door. A supervised iPhone treats your profile as the landlord: with one flag set, the Remove button doesn't exist. Supervision is Apple's own mechanism — it's what schools use for managed iPads — and it's available to any parent with a Mac and a cable.
What you need
- A Mac with Apple Configurator (free, Mac App Store).
- A USB cable to the child's iPhone/iPad.
- Your NextDNS configuration details (for generating the DNS profile).
Step 1 — Generate the DNS profile
- Generate a
.mobileconfigDNS profile at apple.nextdns.io: enter your configuration ID and check "Prohibit Disablement" ("prohibit users from disabling NextDNS"). Heed the generator's own warning — that option only works on supervised devices, which is exactly what we're about to make this one. Download the profile to the Mac.
Step 2 — Make sure the removal lock is in the profile BEFORE install
- If you checked "Prohibit Disablement" in Step 1, the lock is already baked in — skip to Step 3.
- Using a different generator, or a hand-built profile? Open the
.mobileconfigin a text editor (it's XML) and add the removal lock inside the top-level payload dictionary:<key>PayloadRemovalDisallowed</key><true/> - Save. The flag must be in the profile before it's installed — it can't be added to a profile that's already on the device.
Step 3 — Supervise the device
- Plug the child's device into the Mac and open Apple Configurator. The device appears as a tile.
- Select it → Prepare. Choose Manual Configuration; select "Do not enroll in device management" (you're a family, not an IT department); check the supervision option ("designate as a supervised device"). Name your organization something plain ("Our Family").
- Configurator erases and re-provisions the device. Restore the backup / sign back in as the child when it comes up.
Step 4 — Push the locked profile
- With the supervised device connected, drag your edited
.mobileconfigonto its tile in Configurator (or use Add → Profiles). - On the device: Settings → General → VPN & Device Management → the profile is listed — and there is no Remove button. That's the whole point. Worth being honest about: on an unsupervised device this flag isn't actually enforced — the profile stays removable with the device passcode. Supervision is the whole play, not a nice-to-have.
- Verify filtering on cellular one more time. Then try to remove it. Fail. Smile.
Factory tunnels: close these on every device
Modern devices ship with features that politely tunnel around DNS filtering. They're privacy features — legitimately good against advertisers, accidentally great against parents. Close them:
| Tunnel | Where to close it |
|---|---|
| iCloud Private Relay | Settings → [name] → iCloud → Private Relay → off, on every family device. Apple's own docs say Relay is incompatible with network-based filtering and parental controls — it encrypts DNS and routes Safari around your wall. (Per-network alternative: Settings → Wi-Fi → (i) → Limit IP Address Tracking off.) |
| Android Private DNS | Settings → Network & internet → Private DNS (Samsung: Connections → More connection settings). Either "off"/"automatic," or better: pointed at your own NextDNS hostname (that's the traveling wall). What it must never be: some other provider's hostname. |
| Browser secure DNS | Chrome: Settings → Privacy and security → Security → Use secure DNS. Firefox: Settings → Privacy & Security → DNS over HTTPS. Edge and others have equivalents. Each browser can pick its own DNS provider and skip your wall — set them to use the system default, or lock browsers down via the device policies above. |
These reappear after major OS updates often enough that they're on the Layer 7 bypass checklist and the Quarterly Walk.
Done when
- Every screen on the Inventory has device-layer restrictions and a parent-only passcode.
- The traveling wall is installed and verified on cellular, and removal is locked (or at minimum blocked by restrictions).
- Shared computers have individual accounts, a passworded admin, and no auto-login.
- Private Relay, Private DNS, and browser secure-DNS are closed on every device.